


You are looking at the documentation of a prior release. To read the documentation of the latest release, please
visit here.
New to KubeDB? Please start here.
Running MySQL
This tutorial will show you how to use KubeDB to run a MySQL database.
Before You Begin
At first, you need to have a Kubernetes cluster, and the kubectl command-line tool must be configured to communicate with your cluster. If you do not already have a cluster, you can create one by using Minikube.
Now, install KubeDB cli on your workstation and KubeDB operator in your cluster following the steps here.
To keep things isolated, this tutorial uses a separate namespace called demo throughout this tutorial. This tutorial will also use a phpMyAdmin to connect and test MySQL database, once it is running. Run the following command to prepare your cluster for this tutorial:
$ kubectl create -f ./docs/examples/mysql/demo-0.yaml
namespace "demo" created
deployment "myadmin" created
service "myadmin" created

$ kubectl get pods -n demo --watch
NAME                      READY     STATUS              RESTARTS   AGE
myadmin-fccf65985-wszmj   0/1       ContainerCreating   0          10s
myadmin-fccf65985-wszmj   1/1       Running   0         42s

$ kubectl get service -n demo
NAME      TYPE           CLUSTER-IP      EXTERNAL-IP   PORT(S)        AGE
myadmin   LoadBalancer   10.96.229.237   <pending>     80:32746/TCP   2m

$ minikube ip
192.168.99.100
Now, open your browser and go to the following URL: http://{minikube-ip}:{myadmin-svc-nodeport}. You can also get this URl by running the following command:
$ minikube service myadmin -n demo --url
http://192.168.99.100:32746
According to the above example, this URL will be http://192.168.99.100:32746. The logging informations to phpMyAdmin (host, username and password) will be retrieved later in this tutorial.
Create a MySQL database
KubeDB implements a MySQL CRD to define the specification of a MySQL database. Below is the MySQL object created in this tutorial.
apiVersion: kubedb.com/v1alpha1
kind: MySQL
metadata:
  name: m1
  namespace: demo
spec:
  version: 8.0
  doNotPause: true
  storage:
    storageClassName: "standard"
    accessModes:
    - ReadWriteOnce
    resources:
      requests:
        storage: 50Mi
  init:
    scriptSource:
      gitRepo:
        repository: "https://github.com/kubedb/mysql-init-scripts.git"
        directory: .

$ kubedb create -f ./docs/examples/mysql/demo-1.yaml
validating "./docs/examples/mysql/demo-1.yaml"
mysql "m1" created
Here,
spec.versionis the version of MySQL database. In this tutorial, a MySQL 8.0 database is going to be created.spec.doNotPausetells KubeDB operator that if this object is deleted, it should be automatically reverted. This should be set to true for production databases to avoid accidental deletion.spec.storagespecifies the StorageClass of PVC dynamically allocated to store data for this database. This storage spec will be passed to the StatefulSet created by KubeDB operator to run database pods. You can specify any StorageClass available in your cluster with appropriate resource requests. If no storage spec is given, anemptyDiris used.spec.init.scriptSourcespecifies a sql script source used to initialize the database after it is created. The sql scripts will be executed alphabatically. In this tutorial, a sample sql script from the git repositoryhttps://github.com/kubedb/mysql-init-scripts.gitis used to create adashboardtable in test database.
KubeDB operator watches for MySQL objects using Kubernetes api. When a MySQL object is created, KubeDB operator will create a new StatefulSet and a ClusterIP Service with the matching MySQL object name. KubeDB operator will also create a governing service for StatefulSets with the name kubedb, if one is not already present. If RBAC is enabled, a ClusterRole, ServiceAccount and ClusterRoleBinding with the matching object name will be created and used as the service account name for the corresponding StatefulSet.
$ kubedb describe ms -n demo m1
Name:		m1
Namespace:	demo
StartTimestamp:	Fri, 08 Dec 2017 16:26:01 +0600
Status:		Running
Volume:
  StorageClass:	standard
  Capacity:	50Mi
  Access Modes:	RWO

StatefulSet:
  Name:			m1
  Replicas:		1 current / 1 desired
  CreationTimestamp:	Fri, 08 Dec 2017 16:26:05 +0600
  Pods Status:		1 Running / 0 Waiting / 0 Succeeded / 0 Failed

Service:
  Name:		m1
  Type:		ClusterIP
  IP:		10.103.4.145
  Port:		db	3306/TCP

Database Secret:
  Name:	m1-admin-auth
  Type:	Opaque
  Data
  ====
  .admin:	16 bytes

No Snapshots.

Events:
  FirstSeen   LastSeen   Count     From             Type       Reason               Message
  ---------   --------   -----     ----             --------   ------               -------
  1m          1m         1         mysql operator   Normal     SuccessfulValidate   Successfully validate MySQL
  1m          1m         1         mysql operator   Normal     SuccessfulValidate   Successfully validate MySQL
  1m          1m         1         mysql operator   Normal     SuccessfulCreate     Successfully created StatefulSet
  1m          1m         1         mysql operator   Normal     SuccessfulCreate     Successfully created MySQL
  3m          3m         1         mysql operator   Normal     SuccessfulValidate   Successfully validate MySQL
  3m          3m         1         mysql operator   Normal     Creating             Creating Kubernetes objects


$ kubectl get statefulset -n demo
NAME      DESIRED   CURRENT   AGE
m1        1         1         9m

$ kubectl get pvc -n demo
NAME        STATUS    VOLUME                                     CAPACITY   ACCESS MODES   STORAGECLASS   AGE
data-m1-0   Bound     pvc-32c1bce6-dc02-11e7-8116-080027da1cc3   50Mi       RWO            standard       4m

$ kubectl get pv -n demo
NAME                                       CAPACITY   ACCESS MODES   RECLAIM POLICY   STATUS    CLAIM            STORAGECLASS   REASON    AGE
pvc-32c1bce6-dc02-11e7-8116-080027da1cc3   50Mi       RWO            Delete           Bound     demo/data-m1-0   standard                 5m

$ kubectl get service -n demo
NAME      TYPE           CLUSTER-IP      EXTERNAL-IP   PORT(S)        AGE
kubedb    ClusterIP      None            <none>        <none>         5m
m1        ClusterIP      10.103.4.145    <none>        3306/TCP       5m
myadmin   LoadBalancer   10.96.229.237   <pending>     80:32746/TCP   22m
KubeDB operator sets the status.phase to Running once the database is successfully created. Run the following command to see the modified MySQL object:
$ kubedb get ms -n demo m1 -o yaml
apiVersion: kubedb.com/v1alpha1
kind: MySQL
metadata:
  clusterName: ""
  creationTimestamp: 2017-12-08T10:26:01Z
  deletionGracePeriodSeconds: null
  deletionTimestamp: null
  generation: 0
  initializers: null
  name: m1
  namespace: demo
  resourceVersion: "7504"
  selfLink: /apis/kubedb.com/v1alpha1/namespaces/demo/mysqls/m1
  uid: 2fed837e-dc02-11e7-8116-080027da1cc3
spec:
  databaseSecret:
    secretName: m1-admin-auth
  doNotPause: true
  init:
    scriptSource:
      gitRepo:
        directory: .
        repository: https://github.com/kubedb/mysql-init-scripts.git
  storage:
    accessModes:
    - ReadWriteOnce
    resources:
      requests:
        storage: 50Mi
    storageClassName: standard
  version: 8
status:
  creationTime: 2017-12-08T10:26:01Z
  phase: Running
Please note that KubeDB operator has created a new Secret called m1-admin-auth (format: {mongodb-object-name}-admin-auth) for storing the password for mysql superuser. This secret contains a .admin key which contains the password for mongodb superuser. If you want to use an existing secret please specify that when creating the MySQL object using spec.databaseSecret.secretName.
Now, you can connect to this database from the phpMyAdmin dashboard using the database pod IP and mysql user password.
$ kubectl get pods m1-0 -n demo -o yaml | grep IP
  hostIP: 192.168.99.100
  podIP: 172.17.0.6

$ kubectl get secrets -n demo m1-admin-auth -o jsonpath='{.data.\.admin}' | base64 -d
jF6hiD52pctUBL2o
Now, open your browser and go to the following URL: http://{minikube-ip}:{myadmin-svc-nodeport}. To log into the phpMyAdmin, use host 172.17.0.6 , username root and password jF6hiD52pctUBL2o.
Database Snapshots
Instant Backups
Now, you can easily take a snapshot of this database by creating a Snapshot object. When a Snapshot object is created, KubeDB operator will launch a Job that runs the mysqldump command and uploads the output sql file to various cloud providers S3, GCS, Azure, OpenStack Swift and/or locally mounted volumes using osm.
In this tutorial, snapshots will be stored in a Google Cloud Storage (GCS) bucket. To do so, a secret is needed that has the following 2 keys:
| Key | Description |
|---|---|
GOOGLE_PROJECT_ID | Required. Google Cloud project ID |
GOOGLE_SERVICE_ACCOUNT_JSON_KEY | Required. Google Cloud service account json key |
$ echo -n '<your-project-id>' > GOOGLE_PROJECT_ID
$ mv downloaded-sa-json.key > GOOGLE_SERVICE_ACCOUNT_JSON_KEY
$ kubectl create secret generic ms-snap-secret -n demo \
    --from-file=./GOOGLE_PROJECT_ID \
    --from-file=./GOOGLE_SERVICE_ACCOUNT_JSON_KEY
secret "ms-snap-secret" created
$ kubectl get secret ms-snap-secret -n demo -o yaml
apiVersion: v1
data:
  GOOGLE_PROJECT_ID: PHlvdXItcHJvamVjdC1pZD4=
  GOOGLE_SERVICE_ACCOUNT_JSON_KEY: ewogICJ0eXBlIjogInNlcnZpY2VfYWNjb3V...9tIgp9Cg==
kind: Secret
metadata:
  creationTimestamp: 2017-12-08T10:37:08Z
  name: ms-snap-secret
  namespace: demo
  resourceVersion: "8109"
  selfLink: /api/v1/namespaces/demo/secrets/ms-snap-secret
  uid: bd94d6b6-dc03-11e7-8116-080027da1cc3
type: Opaque
To lean how to configure other storage destinations for Snapshots, please visit here. Now, create the Snapshot object.
$ kubedb create -f ./docs/examples/mysql/demo-2.yaml
validating "./docs/examples/mysql/demo-2.yaml"
snapshot "m1-xyz" created

$ kubedb get snap -n demo
NAME      DATABASE   STATUS    AGE
m1-xyz    ms/m1      Running   46s
$ kubedb get snap -n demo m1-xyz -o yaml
apiVersion: kubedb.com/v1alpha1
kind: Snapshot
metadata:
  clusterName: ""
  creationTimestamp: 2017-12-08T10:39:53Z
  deletionGracePeriodSeconds: null
  deletionTimestamp: null
  generation: 0
  initializers: null
  labels:
    kubedb.com/kind: MySQL
    kubedb.com/name: m1
    snapshots.kubedb.com/status: Running
  name: m1-xyz
  namespace: demo
  resourceVersion: "8296"
  selfLink: /apis/kubedb.com/v1alpha1/namespaces/demo/snapshots/m1-xyz
  uid: 203340d0-dc04-11e7-8116-080027da1cc3
spec:
  databaseName: m1
  gcs:
    bucket: restic
  storageSecretName: ms-snap-secret
status:
  phase: Running
  startTime: 2017-12-08T10:39:53Z
Here,
metadata.labelsshould include the type of databasekubedb.com/kind: MySQLwhose snapshot will be taken.spec.databaseNamepoints to the database whose snapshot is taken.spec.storageSecretNamepoints to the Secret containing the credentials for snapshot storage destination.spec.gcs.bucketpoints to the bucket name used to store the snapshot data.
You can also run the kubedb describe command to see the recent snapshots taken for a database.
$ kubedb describe ms -n demo m1
Name:		m1
Namespace:	demo
StartTimestamp:	Fri, 08 Dec 2017 16:26:01 +0600
Status:		Running
Volume:
  StorageClass:	standard
  Capacity:	50Mi
  Access Modes:	RWO

StatefulSet:
  Name:			m1
  Replicas:		1 current / 1 desired
  CreationTimestamp:	Fri, 08 Dec 2017 16:26:05 +0600
  Pods Status:		1 Running / 0 Waiting / 0 Succeeded / 0 Failed

Service:
  Name:		m1
  Type:		ClusterIP
  IP:		10.103.4.145
  Port:		db	3306/TCP

Database Secret:
  Name:	m1-admin-auth
  Type:	Opaque
  Data
  ====
  .admin:	16 bytes

Snapshots:
  Name     Bucket      StartTime                         CompletionTime                    Phase
  ----     ------      ---------                         --------------                    -----
  m1-xyz   gs:restic   Fri, 08 Dec 2017 16:39:53 +0600   Fri, 08 Dec 2017 16:45:05 +0600   Succeeded

Events:
  FirstSeen   LastSeen   Count     From                  Type       Reason               Message
  ---------   --------   -----     ----                  --------   ------               -------
  12s         12s        1         Snapshot Controller   Normal     SuccessfulSnapshot   Successfully completed snapshot
  5m          5m         1         Snapshot Controller   Normal     Starting             Backup running
  17m         17m        1         mysql operator        Normal     SuccessfulValidate   Successfully validate MySQL
  17m         17m        1         mysql operator        Normal     SuccessfulValidate   Successfully validate MySQL
  17m         17m        1         mysql operator        Normal     SuccessfulCreate     Successfully created StatefulSet
  17m         17m        1         mysql operator        Normal     SuccessfulCreate     Successfully created MySQL
  19m         19m        1         mysql operator        Normal     SuccessfulValidate   Successfully validate MySQL
  19m         19m        1         mysql operator        Normal     Creating             Creating Kubernetes objects
Once the snapshot Job is complete, you should see the output of the mysqldump command stored in the GCS bucket.
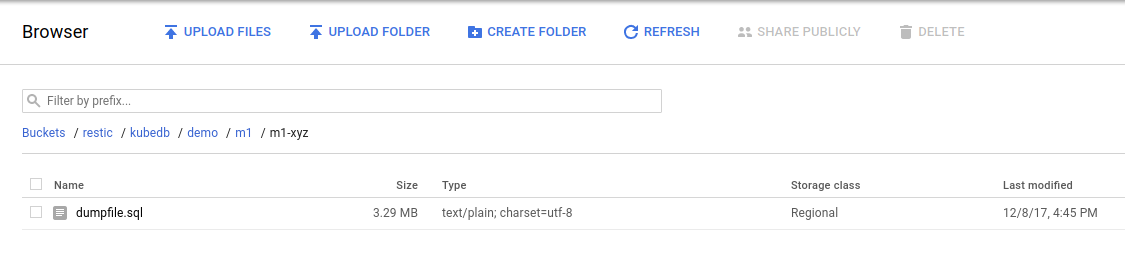
From the above image, you can see that the snapshot output is stored in a folder called {bucket}/kubedb/{namespace}/{mongodb-object}/{snapshot}/.
Scheduled Backups
KubeDB supports taking periodic backups for a database using a cron expression. To take periodic backups, edit the MySQL object to add spec.backupSchedule section.
$ kubedb edit ms m1 -n demo
apiVersion: kubedb.com/v1alpha1
kind: MySQL
metadata:
  name: m1
  namespace: demo
spec:
  version: 8.0
  doNotPause: true
  storage:
    storageClassName: "standard"
    accessModes:
    - ReadWriteOnce
    resources:
      requests:
        storage: 50Mi
  init:
    scriptSource:
      gitRepo:
        repository: "https://github.com/kubedb/mysql-init-scripts.git"
        directory: .
  backupSchedule:
    cronExpression: "@every 1m"
    storageSecretName: ms-snap-secret
    gcs:
      bucket: restic
Once the spec.backupSchedule is added, KubeDB operator will create a new Snapshot object on each tick of the cron expression. This triggers KubeDB operator to create a Job as it would for any regular instant backup process. You can see the snapshots as they are created using kubedb get snap command.
$ kubedb get snap -n demo
NAME                 DATABASE   STATUS      AGE
m1-20171208-105627   ms/m1      Succeeded   1m
m1-20171208-105747   ms/m1      Running     9s
m1-xyz               ms/m1      Succeeded   18m
Restore from Snapshot
You can create a new database from a previously taken Snapshot. Specify the Snapshot name in the spec.init.snapshotSource field of a new MySQL object. See the example recovered object below:
$ cat ./docs/examples/mysql/demo-4.yaml
apiVersion: kubedb.com/v1alpha1
kind: MySQL
metadata:
  name: recovered
  namespace: demo
spec:
  version: 8.0
  storage:
    storageClassName: "standard"
    accessModes:
    - ReadWriteOnce
    resources:
      requests:
        storage: 50Mi
  init:
    snapshotSource:
      name: m1-xyz


$ kubedb create -f ./docs/examples/mysql/demo-4.yaml
validating "./docs/examples/mysql/demo-4.yaml"
mysql "recovered" created
Here,
spec.init.snapshotSource.namerefers to a Snapshot object for a MySQL database in the same namespaces as this newrecoveredMySQL object.
Now, wait several seconds. KubeDB operator will create a new StatefulSet. Then KubeDB operator launches a Kubernetes Job to initialize the new database using the data from m1-xyz Snapshot.
$ kubedb get ms -n demo
NAME        STATUS    AGE
m1          Running   37m
recovered   Running   37s

$ kubedb describe ms -n demo recovered
Name:		recovered
Namespace:	demo
StartTimestamp:	Fri, 08 Dec 2017 17:02:58 +0600
Status:		Running
Volume:
  StorageClass:	standard
  Capacity:	50Mi
  Access Modes:	RWO

StatefulSet:
  Name:			recovered
  Replicas:		1 current / 1 desired
  CreationTimestamp:	Fri, 08 Dec 2017 17:03:03 +0600
  Pods Status:		1 Running / 0 Waiting / 0 Succeeded / 0 Failed

Service:
  Name:		recovered
  Type:		ClusterIP
  IP:		10.105.61.80
  Port:		db	3306/TCP

Database Secret:
  Name:	recovered-admin-auth
  Type:	Opaque
  Data
  ====
  .admin:	16 bytes

No Snapshots.

Events:
  FirstSeen   LastSeen   Count     From             Type       Reason                 Message
  ---------   --------   -----     ----             --------   ------                 -------
  42s         42s        1         mysql operator   Normal     SuccessfulValidate     Successfully validate MySQL
  45s         45s        1         mysql operator   Normal     SuccessfulValidate     Successfully validate MySQL
  49s         49s        1         mysql operator   Normal     SuccessfulInitialize   Successfully completed initialization
  49s         49s        1         mysql operator   Normal     SuccessfulCreate       Successfully created MySQL
  59s         59s        1         mysql operator   Normal     SuccessfulCreate       Successfully created StatefulSet
  59s         59s        1         mysql operator   Normal     Initializing           Initializing from Snapshot: "m1-xyz"
  1m          1m         1         mysql operator   Normal     SuccessfulValidate     Successfully validate MySQL
  1m          1m         1         mysql operator   Normal     Creating               Creating Kubernetes objects
Pause Database
Since the MySQL object created in this tutorial has spec.doNotPause set to true, if you delete the MySQL object, KubeDB operator will recreate the object and essentially nullify the delete operation. You can see this below:
$ kubedb delete ms m1 -n demo
error: MySQL "m1" can't be paused. To continue delete, unset spec.doNotPause and retry.
Now, run kubedb edit ms m1 -n demo to set spec.doNotPause to false or remove this field (which default to false). Then if you delete the MySQL object, KubeDB operator will delete the StatefulSet and its pods, but leaves the PVCs unchanged. In KubeDB parlance, we say that m1 MySQL database has entered into dormant state. This is represented by KubeDB operator by creating a matching DormantDatabase object.
$ kubedb delete ms -n demo m1
mysql "m1" deleted

$ kubedb get drmn -n demo m1
NAME      STATUS    AGE
m1        Pausing   19s

$ kubedb get drmn -n demo m1
NAME      STATUS    AGE
m1        Paused    58s

$ kubedb get drmn -n demo m1 -o yaml
apiVersion: kubedb.com/v1alpha1
kind: DormantDatabase
metadata:
  annotations:
    mysqls.kubedb.com/init: '{"scriptSource":{"gitRepo":{"repository":"https://github.com/kubedb/mysql-init-scripts.git","directory":"."}}}'
  clusterName: ""
  creationTimestamp: 2017-12-08T11:14:08Z
  deletionGracePeriodSeconds: null
  deletionTimestamp: null
  generation: 0
  initializers: null
  labels:
    kubedb.com/kind: MySQL
  name: m1
  namespace: demo
  resourceVersion: "10960"
  selfLink: /apis/kubedb.com/v1alpha1/namespaces/demo/dormantdatabases/m1
  uid: e93f5266-dc08-11e7-8116-080027da1cc3
spec:
  origin:
    metadata:
      creationTimestamp: null
      name: m1
      namespace: demo
    spec:
      mysql:
        databaseSecret:
          secretName: m1-admin-auth
        resources: {}
        storage:
          accessModes:
          - ReadWriteOnce
          resources:
            requests:
              storage: 50Mi
          storageClassName: standard
        version: "8"
status:
  creationTime: 2017-12-08T11:14:08Z
  pausingTime: 2017-12-08T11:14:59Z
  phase: Paused
Here,
spec.originis the spec of the original spec of the original MySQL object.status.phasepoints to the current database statePaused.
Resume Dormant Database
To resume the database from the dormant state, set spec.resume to true in the DormantDatabase object.
$ kubedb edit drmn -n demo m1
apiVersion: kubedb.com/v1alpha1
kind: DormantDatabase
metadata:
  annotations:
    mysqls.kubedb.com/init: '{"scriptSource":{"gitRepo":{"repository":"https://github.com/kubedb/mysql-init-scripts.git","directory":"."}}}'
  clusterName: ""
  creationTimestamp: 2017-12-08T11:14:08Z
  deletionGracePeriodSeconds: null
  deletionTimestamp: null
  generation: 0
  initializers: null
  labels:
    kubedb.com/kind: MySQL
  name: m1
  namespace: demo
  resourceVersion: "10960"
  selfLink: /apis/kubedb.com/v1alpha1/namespaces/demo/dormantdatabases/m1
  uid: e93f5266-dc08-11e7-8116-080027da1cc3
spec:
  resume: true
  origin:
    metadata:
      creationTimestamp: null
      name: m1
      namespace: demo
    spec:
      mysql:
        databaseSecret:
          secretName: m1-admin-auth
        resources: {}
        storage:
          accessModes:
          - ReadWriteOnce
          resources:
            requests:
              storage: 50Mi
          storageClassName: standard
        version: "8"
status:
  creationTime: 2017-12-08T11:14:08Z
  pausingTime: 2017-12-08T11:14:59Z
  phase: Paused
KubeDB operator will notice that spec.resume is set to true. KubeDB operator will delete the DormantDatabase object and create a new MySQL object using the original spec. This will in turn start a new StatefulSet which will mount the originally created PVCs. Thus the original database is resumed.
Wipeout Dormant Database
You can also wipe out a DormantDatabase by setting spec.wipeOut to true. KubeDB operator will delete the PVCs, delete any relevant Snapshot objects for this database and also delete snapshot data stored in the Cloud Storage buckets. There is no way to resume a wiped out database. So, be sure before you wipe out a database.
$ kubedb edit drmn -n demo m1
# set spec.wipeOut: true

$ kubedb get drmn -n demo m1 -o yaml
apiVersion: kubedb.com/v1alpha1
kind: DormantDatabase
metadata:
  clusterName: ""
  creationTimestamp: 2017-12-08T11:17:13Z
  generation: 0
  initializers: null
  labels:
    kubedb.com/kind: MySQL
  name: m1
  namespace: demo
  resourceVersion: "11259"
  selfLink: /apis/kubedb.com/v1alpha1/namespaces/demo/dormantdatabases/m1
  uid: 576b0d8a-dc09-11e7-8116-080027da1cc3
spec:
  origin:
    metadata:
      annotations:
        mysqls.kubedb.com/init: '{"scriptSource":{"gitRepo":{"repository":"https://github.com/kubedb/mysql-init-scripts.git","directory":"."}}}'
      creationTimestamp: null
      name: m1
      namespace: demo
    spec:
      mysql:
        databaseSecret:
          secretName: m1-admin-auth
        resources: {}
        storage:
          accessModes:
          - ReadWriteOnce
          resources:
            requests:
              storage: 50Mi
          storageClassName: standard
        version: "8"
  wipeOut: true
status:
  creationTime: 2017-12-08T11:17:13Z
  pausingTime: 2017-12-08T11:18:03Z
  phase: WipedOut
  wipeOutTime: 2017-12-08T11:18:27Z

$ kubedb get drmn -n demo
NAME      STATUS     AGE
m1        WipedOut   2m
Delete Dormant Database
You still have a record that there used to be a MySQL database m1 in the form of a DormantDatabase database m1. Since you have already wiped out the database, you can delete the DormantDatabase object.
$ kubedb delete drmn m1 -n demo
dormantdatabase "m1" deleted
Cleaning up
To cleanup the Kubernetes resources created by this tutorial, run:
$ kubectl delete ns demo
namespace "demo" deleted
If you would like to uninstall KubeDB operator, please follow the steps here.
Next Steps
- Learn about the details of MySQL object here.
- See the list of supported storage providers for snapshots here.
- Thinking about monitoring your database? KubeDB works out-of-the-box with Prometheus.
- Learn how to use KubeDB in a RBAC enabled cluster.
- Wondering what features are coming next? Please visit here.
- Want to hack on KubeDB? Check our contribution guidelines.