You are looking at the documentation of a prior release. To read the documentation of the latest release, please
visit here.
Don’t know how backup works? Check tutorial on Instant Backup.
Initialize PostgreSQL with Snapshot
KubeDB supports PostgreSQL database initialization. This tutorial will show you how to use KubeDB to initialize a PostgreSQL database with existing snapshot data.
Before You Begin
At first, you need to have a Kubernetes cluster, and the kubectl command-line tool must be configured to communicate with your cluster. If you do not already have a cluster, you can create one by using minikube.
Now, install KubeDB cli on your workstation and KubeDB operator in your cluster following the steps here.
To keep things isolated, this tutorial uses a separate namespace called demo throughout this tutorial.
$ kubectl create ns demo
namespace "demo" created

$ kubectl get ns demo
NAME    STATUS  AGE
demo    Active  5s
Prepare Snapshot
We need a Snapshot to perform this initialization. If you don’t have a Snapshot already, create one by following the tutorial here.
If you have changed the name of either namespace or snapshot object, please modify the YAMLs used in this tutorial accordingly.
Note: Yaml files used in this tutorial are stored in docs/examples/postgres folder in GitHub repository kubedb/cli.
Create PostgreSQL with Snapshot source
You have to specify the Snapshot name and namespace in the spec.init.snapshotSource field of your new Postgres object.
Below is the YAML for PostgreSQL object created in this tutorial.
apiVersion: kubedb.com/v1alpha1
kind: Postgres
metadata:
  name: recovered-postgres
  namespace: demo
spec:
  version: "9.6-v1"
  databaseSecret:
    secretName: script-postgres-auth
  storage:
    storageClassName: "standard"
    accessModes:
    - ReadWriteOnce
    resources:
      requests:
        storage: 50Mi
  init:
    snapshotSource:
      name: instant-snapshot
      namespace: demo
Here,
spec.init.snapshotSourcespecifies Snapshot object information to be used in this initialization process.snapshotSource.namerefers to a Snapshot objectname.snapshotSource.namespacerefers to a Snapshot objectnamespace.
Snapshot instant-snapshot in demo namespace belongs to Postgres script-postgres:
$ kubectl get snap -n demo instant-snapshot
NAME               DATABASENAME      STATUS      AGE
instant-snapshot   script-postgres   Succeeded   56s
Note: Postgres
recovered-postgresmust have same superuser credentials as Postgresscript-postgres.
Now, create the Postgres object.
$ kubedb create -f https://raw.githubusercontent.com/kubedb/cli/0.9.0/docs/examples/postgres/initialization/recovered-postgres.yaml
postgres.kubedb.com/recovered-postgres created
When PostgreSQL database is ready, KubeDB operator launches a Kubernetes Job to initialize this database using the data from Snapshot instant-snapshot.
As a final step of initialization, KubeDB Job controller adds kubedb.com/initialized annotation in initialized Postgres object. This prevents further invocation of initialization process.
$ kubedb describe pg -n demo recovered-postgres -S=false -W=false
Name:           recovered-postgres
Namespace:      demo
StartTimestamp: Thu, 08 Feb 2018 17:23:21 +0600
Status:         Running
Annotations:    kubedb.com/initialized
Init:
  snapshotSource:
    namespace:  demo
    name:       instant-snapshot
Volume:
  StorageClass: standard
  Capacity:     50Mi
  Access Modes: RWO
StatefulSet:    recovered-postgres
Service:        recovered-postgres, recovered-postgres-replicas
Secrets:        script-postgres-auth

Topology:
  Type      Pod                    StartTime                       Phase
  ----      ---                    ---------                       -----
  primary   recovered-postgres-0   2018-02-08 17:23:26 +0600 +06   Running

No Snapshots.

Events:
  FirstSeen   LastSeen   Count     From                Type       Reason               Message
  ---------   --------   -----     ----                --------   ------               -------
  20s         20s        1         Postgres operator   Normal     Successful           Successfully patched StatefulSet
  20s         20s        1         Postgres operator   Normal     Successful           Successfully patched Postgres
  24s         24s        1         Job Controller      Normal     SuccessfulSnapshot   Successfully completed initialization
  31s         31s        1         Postgres operator   Normal     Initializing         Initializing from Snapshot: "instant-snapshot"
  34s         34s        1         Postgres operator   Normal     Successful           Successfully created StatefulSet
  34s         34s        1         Postgres operator   Normal     Successful           Successfully created Postgres
  35s         35s        1         Postgres operator   Normal     Successful           Successfully created Service
  35s         35s        1         Postgres operator   Normal     Successful           Successfully created Service
Verify Initialization
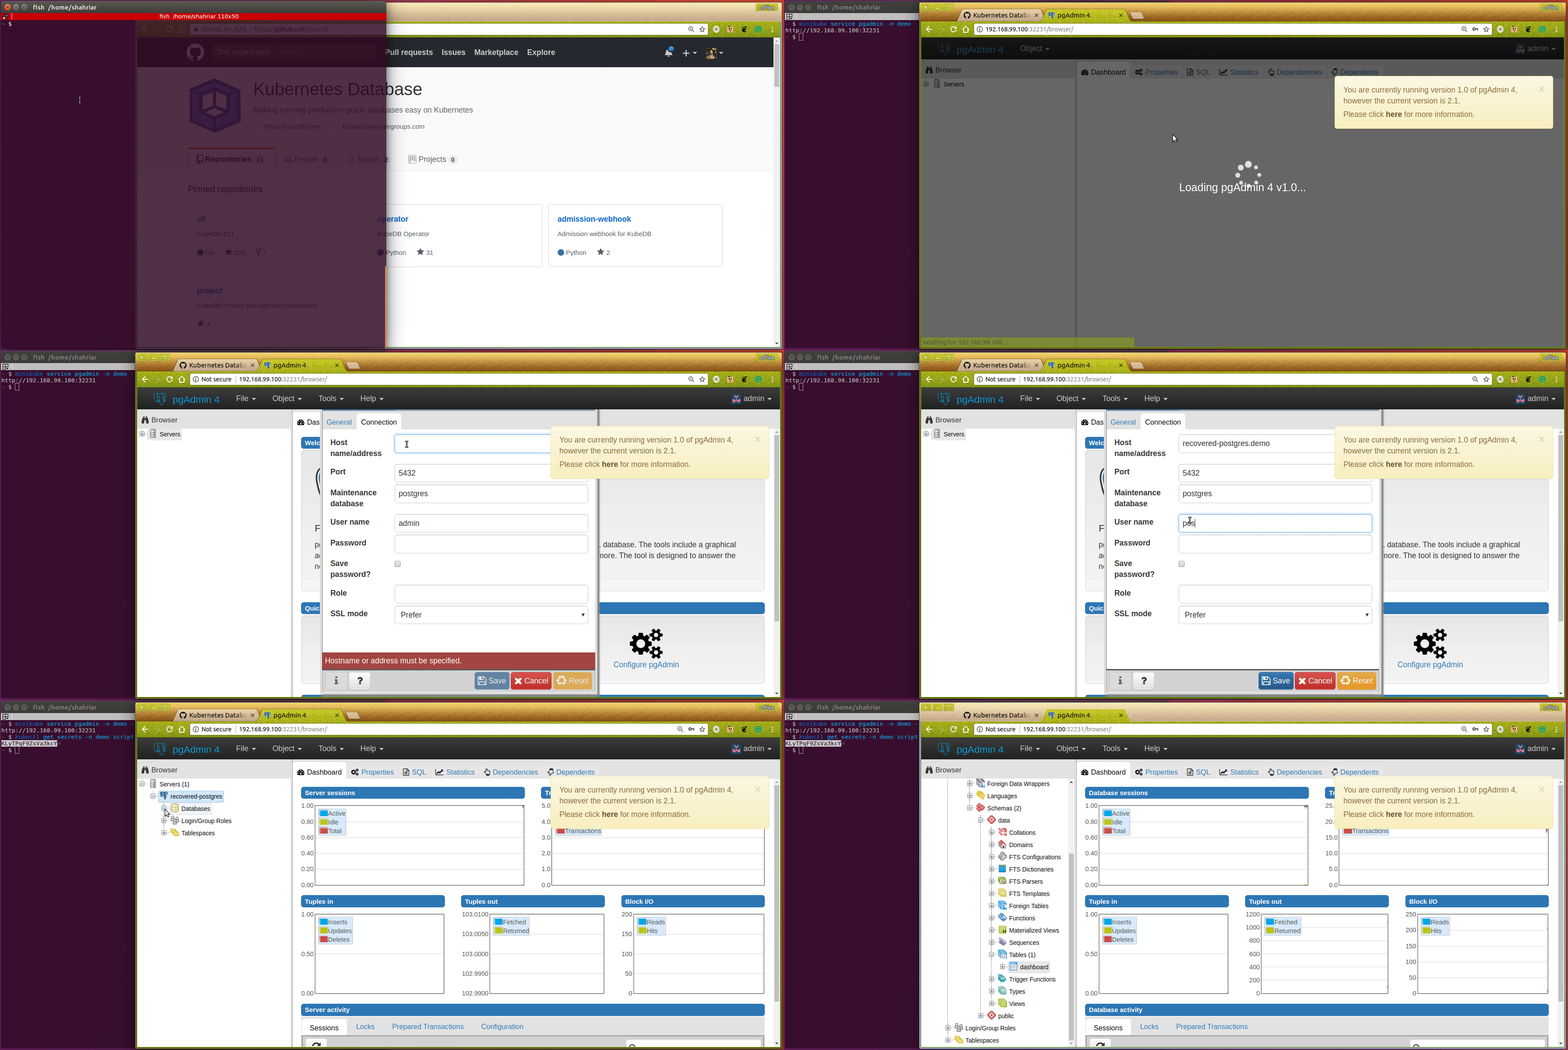
Now, let’s connect to our Postgres recovered-postgres using pgAdmin we have installed in quickstart tutorial to verify that the database has been successfully initialized.
Connection Information:
Host name/address: you can use any of these
- Service:
recovered-postgres.demo - Pod IP: (
$ kubectl get pods recovered-postgres-0 -n demo -o yaml | grep podIP)
- Service:
Port:
5432Maintenance database:
postgresUsername: Run following command to get username,
$ kubectl get secrets -n demo script-postgres-auth -o jsonpath='{.data.\POSTGRES_USER}' | base64 -d
postgres
Password: Run the following command to get password,
$ kubectl get secrets -n demo script-postgres-auth -o jsonpath='{.data.\POSTGRES_PASSWORD}' | base64 -d
STXiSACabNli5xoD
In PostgreSQL, run following query to check pg_catalog.pg_tables to confirm initialization.
select * from pg_catalog.pg_tables where schemaname = 'data';
| schemaname | tablename | tableowner | hasindexes | hasrules | hastriggers | rowsecurity |
|---|---|---|---|---|---|---|
| data | dashboard | postgres | t | f | f | f |
We can see TABLE dashboard in data Schema which is created for initialization.

Cleaning up
To cleanup the Kubernetes resources created by this tutorial, run:
$ kubectl patch -n demo pg/script-postgres pg/recovered-postgres -p '{"spec":{"terminationPolicy":"WipeOut"}}' --type="merge"
$ kubectl delete -n demo pg/script-postgres pg/recovered-postgres

$ kubectl delete ns demo
Next Steps
- Learn about initializing PostgreSQL with Script.
- Learn how to schedule backup of PostgreSQL database.
- Want to setup PostgreSQL cluster? Check how to configure Highly Available PostgreSQL Cluster
- Monitor your PostgreSQL database with KubeDB using built-in Prometheus.
- Monitor your PostgreSQL database with KubeDB using CoreOS Prometheus Operator.
- Want to hack on KubeDB? Check our contribution guidelines.


