


You are looking at the documentation of a prior release. To read the documentation of the latest release, please
visit here.
Deploying KubeDB Platform: Self Hosted Production
Welcome to the Self-Hosted Production deployment guide for the KubeDB Platform. This installation mode is designed for environments requiring high levels of customization and granular control.
By following this walkthrough, you can tailor the deployment to meet your specific production requirements while ensuring a stable and optimized installation.
Why Choose Self-Hosted Production?
The self-hosted model provides the flexibility to:
- Optimize Resources: Tune performance parameters based on your specific workload.
- Custom Configurations: Integrate with existing infrastructure and security policies.
- Production Readiness: Implement the platform using best practices for high availability and reliability.
Deployment Overview
This guide provides a structured approach to deploying the platform manually. We will cover the prerequisite checks, configuration steps, and final verification to ensure your environment is ready for a seamless rollout.
Note: Ensure your infrastructure meets the minimum system requirements before proceeding to the configuration steps.
See Prerequisites in the Common Configuration guide for the minimum cluster requirements and the optional k3s setup note.
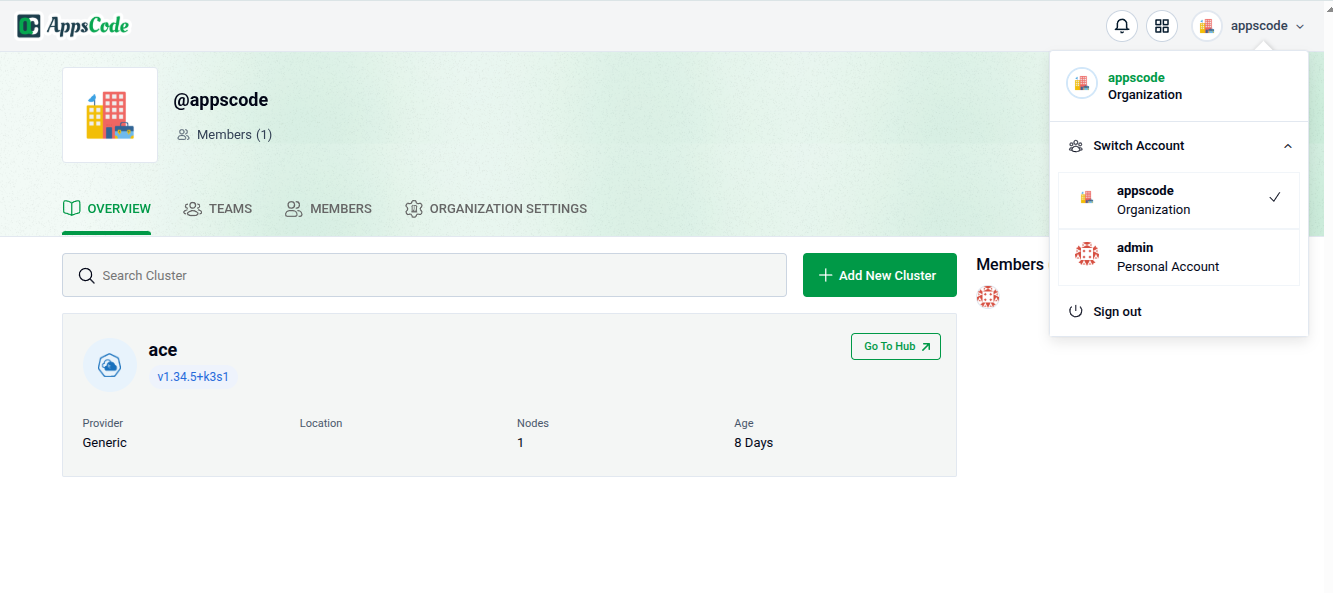
1. Visit the KubeDB Platform Self-Hosted Page
Navigate to KubeDB Platform Self-Hosted. Here you will find your previously generated self-hosted installers.
Click on the Create New Installer button to get started.
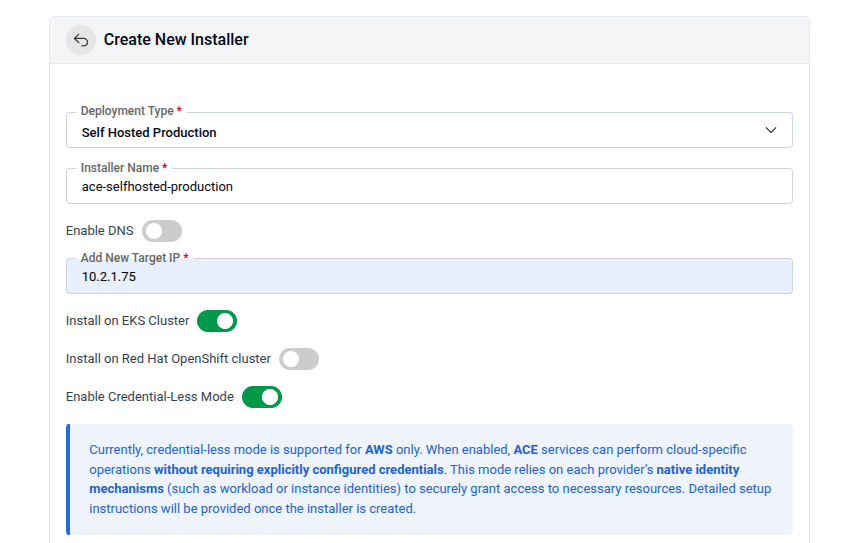
2. Choose Deployment Mode And Environment
Choose Deployment Type -> Self Hosted Production and give it a name in the installer name section.
Before beginning the installation, identify your target infrastructure and cluster type.
- DNS & Connectivity:
- Enable DNS: Toggle this to allow the installer to manage or integrate with your DNS provider.
- Target IP: Provide the static IP addresses for your cluster nodes or load balancer.
- Cluster Type: Determine if you are installing on AWS EKS Cluster or Red Hat OpenShift Cluster. For openshift cluster toggle Red Hat OpenShift cluster and give Kube API Server endpoint. See the Deploying KubeDB Platform in OpenShift Cluster guide.
- Credential-Less Mode: Enable this if you are using IAM roles for service accounts (IRSA) to avoid manual secret management.
Additional configuration for EKS cluster
See Additional configuration for EKS cluster in the Common Configuration guide for the EBS CSI / AWS Load Balancer Controller prerequisites and the commands to fetch the Kube API server endpoint, subnet IDs, and EIP allocation IDs.
Configuring AWS credentialless mode
For Database backup process KubeDB uses KubeStash and KubeStash depends on Object storage for storing data. If you configure S3 in aws then by configuring credentialless mode you can avoid the hassle of using Access Key and Secret Key. You can configure credentialless mode for both EC2(K3s cluster VM) and EKS infrastucture.
EC2 Instance
If you are managing credentialless mode in EC2 VM then you will get policy permission json file after clicking the deploy button. You need to attach this to EC2 instance profile. Follow the following steps for policy attachment
1. Create the IAM Policy
First, create the policy in your AWS account.
aws iam create-policy \
    --policy-name <your-policy-name> \
    --policy-document file://iam-selfhost-permission.json
Note: Copy the Arn from the output; you will need it for the next step. It will look like: arn:aws:iam::123456789012:policy/<your-policy-name>.
2. Identify your IAM Role
If you don’t know the exact name of the role currently attached to your EC2 instance, use this command to list the role attached to your specific instance:
aws ec2 describe-instances \
    --instance-id <your-instance-id> \
    --query "Reservations[0].Instances[0].IamInstanceProfile.Arn" \
    --output text
3. Attach the Policy to the Role
Once you have the role name, attach the newly created policy to it.
aws iam attach-role-policy \
    --role-name <your-role-name> \
    --policy-arn arn:aws:iam::123456789012:policy/<your-policy-name>
Verifying the Setup
After running the command, you can verify that the policy is attached to the role:
aws iam list-attached-role-policies --role-name <your-role-name>
EKS Cluster
Use following steps to give necessary permission to the credential manager controller through service acccount.
Here you have to give IRSA related information. Create Role for IRSA and get OIDC ID
export CLUSTER_NAME=<cluster name>
export REGION=<cluster region>
export ACCOUNT_ID=<aws account id>

OIDC_ID=$(aws eks describe-cluster --name $CLUSTER_NAME --region $REGION --query "cluster.identity.oidc.issuer" --output text | cut -d '/' -f 5)
echo $OIDC_ID

#Verify the OIDC already created or not
aws iam list-open-id-connect-providers | grep $OIDC_ID | cut -d "/" -f4

#If the command doesn't return the oidc id then create one
eksctl utils associate-iam-oidc-provider --cluster $CLUSTER_NAME --region $REGION --approve
Download Policy and trust-relationship files
for file in iam-ec2-permissions.json iam-eks-permissions.json template-trust-relationship; do
  echo "http://cdn.appscode.com/files/products/appscode/aws-selfhost/$file"
done | xargs -n 1 -P 4 curl -O
Create Policy using the downloaded files skip if the policy already exists, take note of the policy arn which will be attached to the role next
# grab the policy arn’s from the output
aws iam create-policy --policy-name AceSelfhostInstallerEC2Policy --policy-document file://iam-ec2-permissions.json
EC2_POLICY_ARN=$(aws iam list-policies --query "Policies[?PolicyName==’AceSelfhostInstallerEC2Policy’].Arn" --output text)
aws iam create-policy --policy-name AceSelfhostInstallerEKSPolicy --policy-document file://iam-eks-permissions.json
EKS_POLICY_ARN=$(aws iam list-policies --query "Policies[?PolicyName==’AceSelfhostInstallerEKSPolicy’].Arn" --output text)
Create Role using the downloaded trust-relationship file
sed -e "s/OIDC_ID/$OIDC_ID/g" -e "s/ACCOUNT_ID/$ACCOUNT_ID/g" -e "s/REGION/$REGION/g" -e "s/SA_NAMESPACE/"ace"/g" -e "s/SA_NAME/"ace"/g" template-trust-relationship > ace-trust-relationship.json
aws iam create-role --role-name AceInstaller-$OIDC_ID --assume-role-policy-document file://ace-trust-relationship.json --description "A role to be used by KubeDB Platform selfhost installer"
ROLE_ARN=$(aws iam get-role --role-name AceInstaller-$OIDC_ID --query "Role.Arn" --output text)
# attach Policies to the Role
aws iam attach-role-policy --role-name AceInstaller-$OIDC_ID --policy-arn=$EC2_POLICY_ARN
aws iam attach-role-policy --role-name AceInstaller-$OIDC_ID --policy-arn=$EKS_POLICY_ARN
Create and associate access policy
# Create access entry
aws eks create-access-entry \
  --cluster-name $CLUSTER_NAME \
  --region $REGION \
  --principal-arn $ROLE_ARN \
  --type STANDARD
# Associate access policy
aws eks associate-access-policy \
  --cluster-name $CLUSTER_NAME \
  --region $REGION \
  --principal-arn $ROLE_ARN \
  --policy-arn arn:aws:eks::aws:cluster-access-policy/AmazonEKSClusterAdminPolicy \
  --access-scope type=cluster
Provide the output role arn as Ace Installer Role ARN echo $ROLE_ARNin the Ace Installer Role ARN field.
3. Global Administrative Settings
See Global Administrative Settings in the Common Configuration guide for the System Admin account fields (display name, email, password, and initial organization).
4. Release
Define the specific Kubernetes namespace and release information for the KubeDB Platform components.
- Release Name: Defaults to
ace. - Namespace: Enter the target namespace (default:
ace). - Namespace Automation: Toggle “Create namespaces during Helm install” if you want the installer to handle namespace lifecycle management.
5. Registry
See Registry in the Common Configuration guide for Docker registry proxies, Helm repositories, credentials, certs, and image pull secrets.
6. Settings
This secton is for Persistence & Resource Allocation. Properly sizing your resources is critical for production stability. Configure CPU Requests, CPU Limits, Memory Request and Memory Limit for both cache and Database
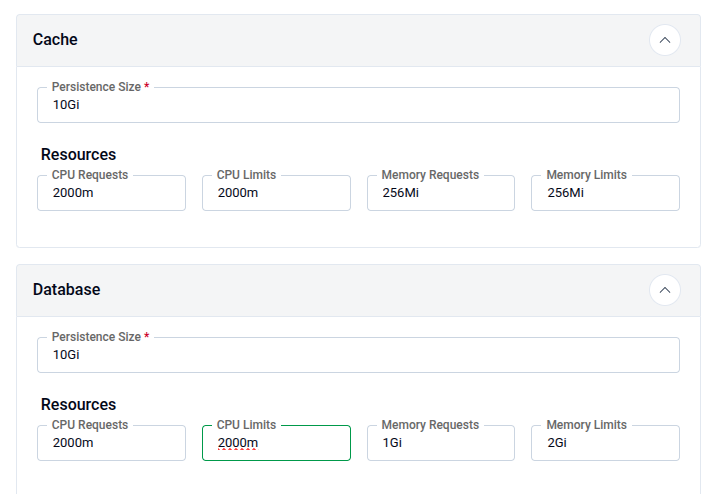
[!IMPORTANT] Ensure your cluster has a Storage Class defined to fulfill the PVC requests for both the Cache and the Database.
Domain White List and Proxy Servers
See Domain White List and Proxy Servers in the Common Configuration guide for whitelisting domains, proxy servers, and login/logout URLs.
KubeStash
KubeDB Platform uses KubeStash for automated backups and disaster recovery.
- Retention Policy: Define how long backups are kept (e.g.,
keep-1mo). - Schedule: Set the backup frequency using Cron syntax (default:
0 */2 * * *or every 2 hours). - Storage Secret: Select the secret containing credentials for your cloud provider.
7. Monitoring
See Monitoring in the Common Configuration guide for Alertmanager email and webhook configuration.
8. Infra
- Cloud Services: Configure your Provider (e.g., AWS, GCP, Azure), Bucket Name, Endpoint, Region and Prefix. In the Auth Section put your
AWS Access Key ID,AWS Secret Access KeyandCA CERT Data - StorageClass: Select your StorageClass in this section
- TLS: Configure TLS certificates for secure communication. You can choose the Issuer type from the following list.
External: Use this if you already have certificates from an external provider.
- CA CERT: Paste the Certificate Authority certificate.
- Certificate CERT: Paste the certificate issued for your domain.
- Certificate Key: Paste the private key associated with the certificate.
CA: Use this if you want AppsCode to manage your certificates with its internal CA.
- CA CERT: Paste the internal CA certificate.
- CA Key: Paste the internal CA key.
letsencrypt: Use this for production environments to obtain globally trusted SSL/TLS certificates.
letsencrypt-staging: Use this for testing your installation
9. Ingress & Gateway
See Ingress & Gateway in the Common Configuration guide for exposing the platform via the Gateway API or standard Ingress.
10. NATS
See NATS in the Common Configuration guide for configuring the internal messaging system (expose method, replicas, and resources).
11. Self Management
See Self Management in the Common Configuration guide to enable or disable platform features.
12. Branding & UI Customization
See Branding & UI Customization in the Common Configuration guide to re-brand the platform interface.
13. Generate Installer and Documentation
Click the “Deploy” button to submit your information. KubeDB Platform will generate the installer and provide the necessary documentation.
14. Deploy KubeDB Platform
Follow the documentation provided by AppsCode to deploy the KubeDB Platform on your system.
15. Explore the Deployed Platform
Once deployed, access the KubeDB Platform using the specified domain. Log in with the admin account credentials provided during the creation process.After the login process you will see the KubeDB Platform dashboard user interface