


You are looking at the documentation of a prior release. To read the documentation of the latest release, please
visit here.
Backup MongoDB using KubeStash Auto-Backup
KubeStash can be configured to automatically backup any MongoDB database in your cluster. KubeStash enables cluster administrators to deploy backup blueprints ahead of time so that the database owners can easily backup their database with just a few annotations.
In this tutorial, we are going to show how you can configure a backup blueprint for MongoDB databases in your cluster and backup them with few annotations.
Before You Begin
- At first, you need to have a Kubernetes cluster, and the
kubectlcommand-line tool must be configured to communicate with your cluster. If you do not already have a cluster, you can create one by usingMinikubeorKind. - Install
KubeDBin your cluster following the steps here. - Install
KubeStashin your cluster following the steps here. - Install KubeStash
kubectlplugin following the steps here. - If you are not familiar with how KubeStash backup and restore
MongoDBdatabases, please check the following guide here.
You should be familiar with the following KubeStash concepts:
To keep things isolated, we are going to use a separate namespace called demo throughout this tutorial. Create demo namespace if you haven’t created yet.
$ kubectl create ns demo
namespace/demo created
Prepare Backup Blueprint
BackupBlueprint is a non-namespaced Custom Resource that lets you define a common template for taking backup for all the similar applications. Then, you can just apply some annotations in the targeted application to enable backup. KubeStash will automatically resolve the template and create a BackupConfiguration for the targeted application.
So we can also take backup any MongoDB database of any namespace just by adding few annotations to our MongoDB CRD. Then, KubeStash will automatically create a BackupConfiguration according to the template to backup the database.
We are going to store our backed up data into a S3 bucket. At first, we need to create a secret with S3 credentials then we need to create a BackupStorage crd. If you want to use a different backend, please read the respective backend configuration doc from here.
Create Storage Secret:
Let’s create a secret called s3-secret with access credentials to our desired S3 bucket,
$ echo -n '<your-aws-access-key-id-here>' > AWS_ACCESS_KEY_ID
$ echo -n '<your-aws-secret-access-key-here>' > AWS_SECRET_ACCESS_KEY
$ kubectl create secret generic -n demo s3-secret \
    --from-file=./AWS_ACCESS_KEY_ID \
    --from-file=./AWS_SECRET_ACCESS_KEY
secret/s3-secret created
Create BackupStorage:
Now, crete a BackupStorage using this secret. Below is the YAML of BackupStorage CRO we are going to create,
apiVersion: storage.kubestash.com/v1alpha1
kind: BackupStorage
metadata:
  name: s3-storage
  namespace: demo
spec:
  storage:
    provider: s3
    s3:
      endpoint: us-east-1.linodeobjects.com
      bucket: kubestash-testing
      region: us-east-1
      prefix: demo
      secretName: s3-secret
  usagePolicy:
    allowedNamespaces:
      from: All
  deletionPolicy: WipeOut
Let’s create the BackupStorage we have shown above,
$ kubectl apply -f https://github.com/kubedb/docs/raw/v2024.11.8-rc.0/docs/guides/mongodb/backup/kubestash/auto-backup/examples/backupstorage.yaml
backupstorage.storage.kubestash.com/s3-storage created
We also need to create an secret for encrypt data and retention policy for BackupBlueprint to create BackupConfiguration
Create Encryption Secret:
EncryptionSecret refers to the Secret containing the encryption key which will be used to encode/decode the backed up data. Let’s create a secret called encry-secret
$ kubectl create secret generic encry-secret -n demo \
    --from-literal=RESTIC_PASSWORD='123' -n demo
secret/encry-secret created
Create Retention Policy:
RetentionPolicy specifies how the old Snapshots should be cleaned up. This is a namespaced CRD. However, we can refer it from other namespaces as long as it is permitted via .spec.usagePolicy. Below is the YAML of the RetentionPolicy called backup-rp
apiVersion: storage.kubestash.com/v1alpha1
kind: RetentionPolicy
metadata:
  name: backup-rp
  namespace: demo
spec:
  maxRetentionPeriod: 2mo
  successfulSnapshots:
    last: 10
  usagePolicy:
    allowedNamespaces:
      from: All
Let’s create the RetentionPolicy we have shown above,
$ kubectl apply -f https://github.com/kubedb/docs/raw/v2024.11.8-rc.0/docs/guides/mongodb/backup/kubestash/auto-backup/examples/retentionpolicy.yaml
retentionpolicy.storage.kubestash.com/backup-rp created
Now we can create BackupBlueprint. Below is the YAML of BackupBlueprint object that we are going to use in this tutorial,
apiVersion: core.kubestash.com/v1alpha1
kind: BackupBlueprint
metadata:
  name: sample-blueprint
  namespace: demo
spec:
  usagePolicy:
    allowedNamespaces:
      from: All
  backupConfigurationTemplate:
    deletionPolicy: OnDelete
    backends:
      - name: s3-backend
        storageRef:
          namespace: ${storageNamespace}
          name: ${storageName}
        retentionPolicy:
          name: backup-rp
          namespace: demo
    sessions:
      - name: frequent
        scheduler:
          jobTemplate:
            backoffLimit: 1
          schedule: ${scheduleTime}
        repositories:
          - name: ${repoName}
            backend: s3-backend
            directory: ${backupPath}
            encryptionSecret:
              name: encry-secret
              namespace: demo
        addon:
          name: mongodb-addon
          tasks:
            - name: logical-backup
Here, we define a template for BackupConfiguration. Notice the backends and sessions fields of backupConfigurationTemplate section. We have used some variables in form of ${VARIABLE_NAME}. KubeStash will automatically resolve those variables from the database annotations information to make BackupConfiguration according to that databases need.
Let’s create the BackupBlueprint we have shown above,
❯ kubectl apply -f https://github.com/kubedb/docs/raw/v2024.11.8-rc.0/docs/guides/mongodb/backup/kubestash/auto-backup/examples/backupblueprint.yaml
backupblueprint.core.kubestash.com/sample-blueprint created
Now, we are ready to backup our MongoDB databases using few annotations.
Create Database
Now, we are going to create an MongoDB CRO in demo namespace. Below is the YAML of the MongoDB object that we are going to create,
apiVersion: kubedb.com/v1alpha2
kind: MongoDB
metadata:
  name: mgo
  namespace: demo
  annotations:
    blueprint.kubestash.com/name: sample-blueprint
    blueprint.kubestash.com/namespace: demo
    variables.kubestash.com/storageNamespace: demo
    variables.kubestash.com/storageName: s3-storage
    variables.kubestash.com/scheduleTime: "*/3 * * * *"
    variables.kubestash.com/backupPath: /demo/mgo
    variables.kubestash.com/repoName: s3-repo
spec:
  version: "4.4.26"
  storageType: Durable
  storage:
    storageClassName: "standard"
    accessModes:
      - ReadWriteOnce
    resources:
      requests:
        storage: 1Gi
  terminationPolicy: WipeOut
Notice the annotations section. We are pointing to the BackupBlueprint that we have created earlier through blueprint.kubestash.com annotation. Also we pass the value of the variable of different template through some variables.kubestash.com annotations .KubeStash will watch this annotation and a BackupConfiguration according to the BackupBlueprint.
Let’s create the above MongoDB CRO,
❯ kubectl apply -f https://github.com/kubedb/docs/raw/v2024.11.8-rc.0/docs/guides/mongob/backup/kubestash/auto-backup/examples/sample-mongodb.yaml
mongodb.kubedb.com/sample-mongodb created
Verify Auto-backup configured
In this section, we are going to verify whether KubeStash has created the respective BackupConfiguration for our MongoDB database we have just deployed or not.
Verify BackupConfiguration
If everything goes well, KubeStash should create a BackupConfiguration for our MongoDB in demo namespace and the phase of that BackupConfiguration should be Ready. Verify the BackupConfiguration crd by the following command,
❯ kubectl get backupconfiguration -n demo
NAME             PHASE   PAUSED   AGE
appbinding-mgo   Ready            102s
Now, let’s check the YAML of the BackupConfiguration.
❯ kubectl get backupconfiguration -n demo appbinding-mgo -oyaml
apiVersion: core.kubestash.com/v1alpha1
kind: BackupConfiguration
metadata:
  creationTimestamp: "2023-12-08T11:48:27Z"
  finalizers:
  - kubestash.com/cleanup
  generation: 1
  labels:
    app.kubernetes.io/managed-by: kubestash.com
    kubestash.com/invoker-name: sample-blueprint
    kubestash.com/invoker-namespace: demo
  name: appbinding-mgo
  namespace: demo
  resourceVersion: "323212"
  uid: 903a354a-7bdb-4a90-a96a-ccdf465b33fd
spec:
  backends:
  - name: s3-backend
    retentionPolicy:
      name: backup-rp
      namespace: demo
    storageRef:
      name: s3-storage
      namespace: demo
  sessions:
  - addon:
      name: mongodb-addon
      tasks:
      - name: logical-backup
    failurePolicy: Fail
    name: frequent
    repositories:
    - backend: s3-backend
      directory: /demo/mgo
      encryptionSecret:
        name: encry-secret
        namespace: demo
      name: s3-repo
    scheduler:
      jobTemplate:
        template:
          controller: {}
          metadata: {}
          spec:
            resources: {}
      schedule: '*/3 * * * *'
    sessionHistoryLimit: 1
  target:
    apiGroup: kubedb.com
    kind: MongoDB
    name: mgo
    namespace: demo
status:
  backends:
  - name: s3-backend
    ready: true
    retentionPolicy:
      found: true
      ref:
        name: backup-rp
        namespace: demo
    storage:
      phase: Ready
      ref:
        name: s3-storage
        namespace: demo
  conditions:
  - lastTransitionTime: "2023-12-08T11:48:57Z"
    message: Validation has been passed successfully.
    reason: ResourceValidationPassed
    status: "True"
    type: ValidationPassed
  dependencies:
  - found: true
    kind: Addon
    name: mongodb-addon
  phase: Ready
  repositories:
  - name: s3-repo
    phase: Ready
  sessions:
  - conditions:
    - lastTransitionTime: "2023-12-08T11:49:07Z"
      message: Scheduler has been ensured successfully.
      reason: SchedulerEnsured
      status: "True"
      type: SchedulerEnsured
    name: frequent
  targetFound: true
Here we can see that,
spec.storageReftemplate variables are overwrite by thestorageNamespaceandstorageNamevariable annotations of themgoMongoDBspec.sessions.scheduler.scheduletemplate variable is overwrite by thescheduleTimevariable annotation of themgoMongoDBspec.sessions.repositories.nametemplate variable is overwrite by therepoNamevariable annotation of themgoMongoDBspec.sessions.repositories.directorytemplate variable is overwrite by thebackupPathvariable annotation of themgoMongoDB
Verify Backup
Now, let’s wait for a backup run to complete. You can watch for BackupSession as below,
❯ kubectl get backupsession -n demo
NAME                                 INVOKER-TYPE          INVOKER-NAME     PHASE       DURATION   AGE
appbinding-mgo-frequent-1702036262   BackupConfiguration   appbinding-mgo   Succeeded              3m5s
appbinding-mgo-frequent-1702036442   BackupConfiguration   appbinding-mgo   Running                5s
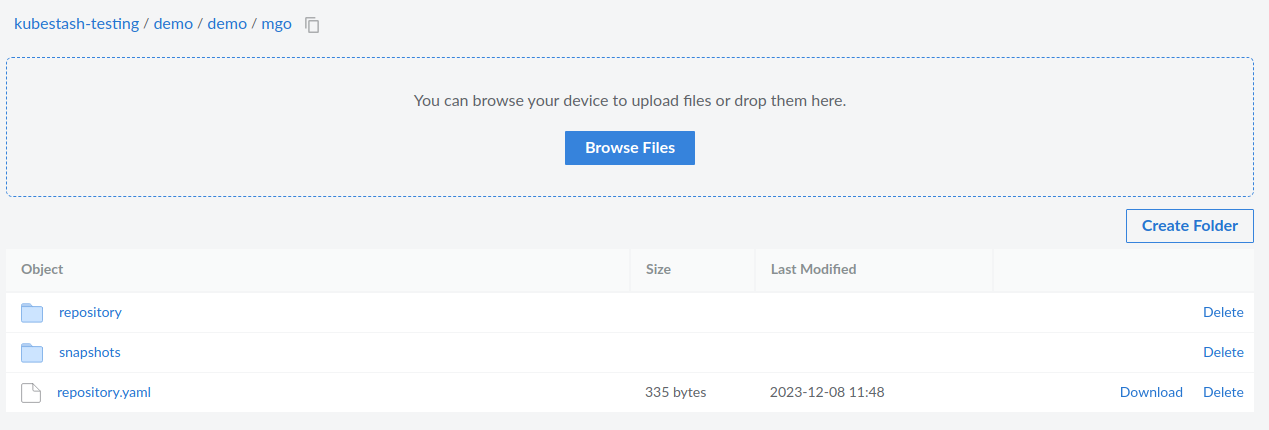
Once the backup has been completed successfully, you should see the backed up data has been stored in the bucket at the directory pointed by the spec.sessions.repositories.directory field of the BackupConfiguration.
Cleanup
To cleanup the resources crated by this tutorial, run the following commands,
❯ kubectl delete -f https://github.com/kubedb/docs/raw/v2024.11.8-rc.0/docs/guides/mongodb/backup/kubestash/auto-backup/examples/
backupblueprint.core.kubestash.com "sample-blueprint" deleted
backupstorage.storage.kubestash.com "s3-storage" deleted
retentionpolicy.storage.kubestash.com "backup-rp" deleted
mongodb.kubedb.com "mgo" deleted